


Introduction
Instead of going to a photo booth or hiring a professional photographer, you can save time and money by taking your passport photo at home. But you got to pay close attention to detail if you want your photo to pass muster with the authorities. From preparing your area to editing the finished shot, this tutorial will show you how to take passport photos at home.
Why Take Passport Photos at Home?
Convenience and Cost Savings
There are a lot of benefits to taking passport photos at home, including saving time and money. You won’t have to spend money on professional services or deal with the inconvenience of going to a photo booth or studio. You can do professional-quality work without leaving your house if you have a few basic tools and some knowledge. Having the option to take your own photos at your convenience can be incredibly helpful when applying for a new passport, renewing an old one, or even a visa. You can save a lot of money if you need passport photos for more than one person in your family.
Control Over the Process
Taking your passport photo at home gives you full control over the entire process. You won’t have to worry about time limits or extra expenses if you take as many shots as you need to get the perfect shot. To make sure the photo satisfies the exacting standards set by passport offices, this degree of control can be especially useful. Until you find the perfect combination of lighting, backdrop, and pose, feel free to experiment. In addition, you have the option to verify that the photo you submitted truly depicts you, which is crucial when applying for an identification document.
Immediate Results
Immediate results are one of the main draws of taking passport photos at home. Before you print the final image, you can quickly review and edit it to make sure it meets all of your specifications. If you need to change anything, like the lighting, the camera angle, or even your posture, you can do it right away thanks to this instant feedback loop. On the other hand, if you went to a professional photo studio or booth, you might have to wait for the results and maybe even go back if the photos aren’t up to par.
Equipment Needed for Home Passport Photos
Camera
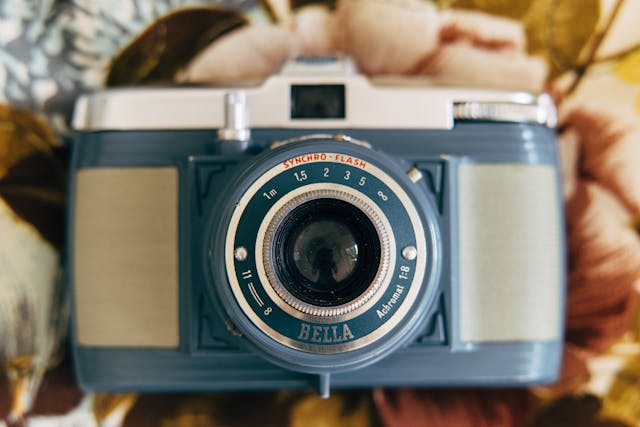

It is absolutely necessary to have a high-resolution smartphone camera or a high-quality digital camera. Verify that the camera can take pictures in bright, well-lit environments. You can get more than enough photo quality with the cameras on most new smartphones. The most important thing is to have a camera that can capture clear, high-quality images. To prevent smudges or blurriness that could diminish the quality of your smartphone photo, clean the lens before taking the shot.
Tripod or Stable Surface
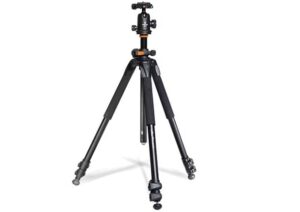

To avoid blurry or otherwise unusable shots, steady your camera on a tripod or other sturdy surface. If you don’t own a tripod, you can use a bookcase or any sturdy object to steady the camera and get the shot you want. Maintaining a steady position is essential, as even a little movement can lead to blurriness, making the photo unusable. Be careful to secure your camera at eye level and in a stable location so that it doesn’t move around while you’re taking pictures.
White or Light-Colored Background
Your passport photo must have a white or very light-colored background. Backgrounds such as large sheets of white paper or fabric, or even just a white wall, would work well. Verify that the backdrop does not contain any patterns or shadows. Nothing should be on the backdrop that could divert attention away from your face, such as marks, decorations, or textures. You must ensure that your features are clearly visible against a plain background in order to meet the strict requirements of passport photos.
Lighting
To get a decent passport photo, you need to use the right lighting. If you can’t get your hands on some natural light, use bright, even artificial lighting. Because of the harsh shadows and reflections it can produce, direct flash usage is discouraged. The ideal lighting is muted, even illumination. Put the lights where they will cast the least amount of shadow and make sure they’re shining evenly on your face. Two lights, one on each side of the subject, can help even out the light and minimize shadows when shooting with artificial lighting. Your face should be well-lit and free of harsh contrasts in order to achieve this.
Step-by-Step Guide to Taking Passport Photos at Home
Preparing Your Space
Choosing the Right Location
Choose an area of your house with a plain, light-colored wall or arrange a white backdrop. If you don’t want shadows cast on your face or the background, make sure the room is brightly lit. To do this, you may need to move some furniture around or temporarily create a room that you can use for taking pictures. It would be best if the area wasn’t cluttered with objects that could throw off the lighting or divert attention. To get the greatest shot, you need a clean, peaceful area to concentrate.
Setting Up Lighting
Eliminate shadows by positioning your lighting sources. Position yourself so that light from a window illuminates your subject. To achieve uniform lighting, position your artificial lights at an angle to the subject’s sides. A diffuser or softbox, if available, can help soften the light and lessen the severity of shadows cast by the subject. Because the photo might be rejected due to uneven lighting, it is crucial to have the lighting set up correctly. Strike a balance between too much light and too little so that your face features stand out.
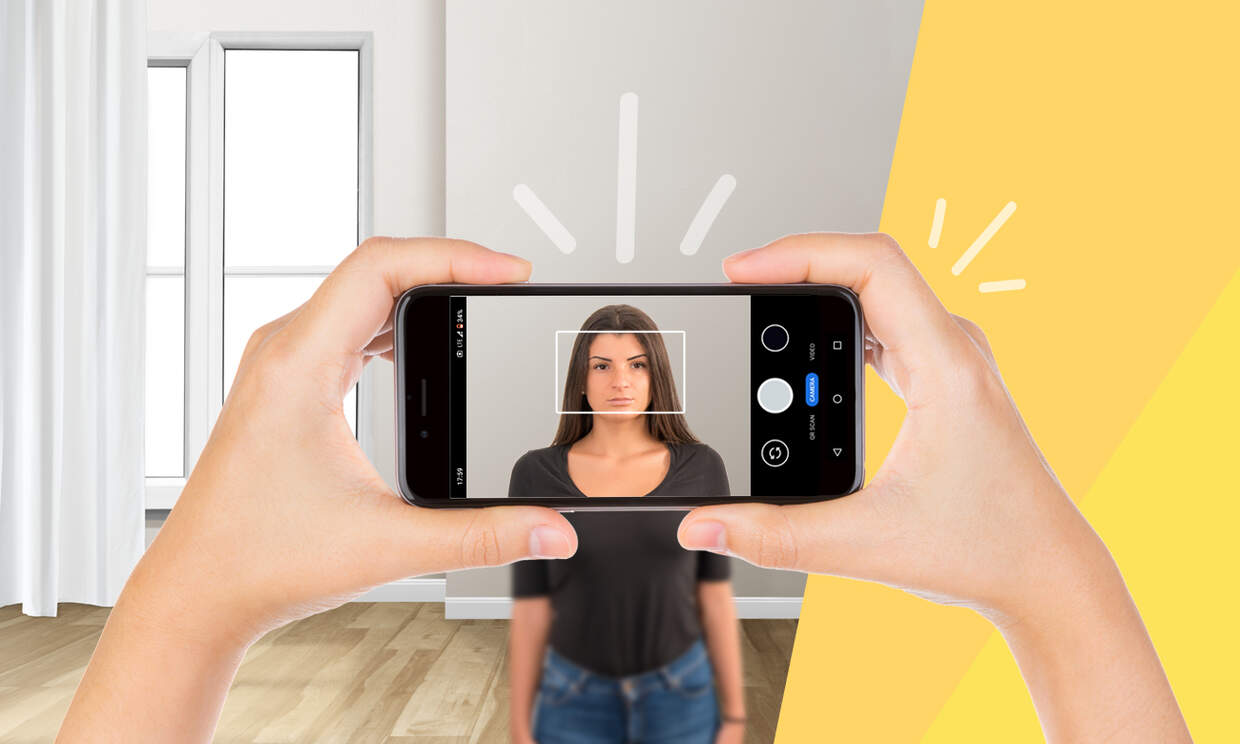
Positioning the Camera
Mount your mobile device, such as a camera or phone, on a sturdy tripod. To get a head-on shot, position the camera so that it’s level with your eyes. Always use the highest resolution on your mobile device. The ideal distance for the camera to be standing at, to get a clear shot of your head and shoulders, is four to six feet. Verify that your face is in the exact center of the frame and that the camera is horizontally aligned. With this arrangement, you can be sure that the finished shot will have proper proportions and will not suffer from distortions.
Taking the Photo
Dress Appropriately
Opt for simple, everyday attire. Steer clear of patterned clothing, fluorescent hues, and uniforms. Unless you are required to do so by religious law, remove all caps and make sure your face is completely exposed. Maintaining an unobstructed line of sight to your face is essential. Please refrain from wearing any headgear that might hide your features, such as a hat or a headband. In most cases, men should either shave or keep their beards neat and tidy. If women want to look their best, they should avoid heavy makeup.
Position Yourself Correctly
Keep a distance of 1.5 to 2 meters from the camera. Find a spot in the middle of the frame where your shoulders and head can be seen clearly. Keep your eyes open, maintain a neutral expression, and expose your face completely. Do not make any overly dramatic facial expressions and keep your lips sealed. Keep your hair pulled back if it droops over your face, and make sure your ears are visible. Make sure your shoulders are squared to the camera and that your back is relaxed.
Taking the Shot
For this shot, a remote shutter or self-timer will work well. Get the camera in focus and shoot a few different shots before deciding which one to use. Make sure there is neutral expression, good lighting, and appropriate framing. Make sure you don’t miss any problematic details by reviewing each shot on a larger screen. If you take multiple shots and compare them, you can choose the best one, reducing the likelihood that you will have to start over if the first ones don’t work.
Editing and Finalizing the Photo
Editing for Compliance
To fix lighting, contrast, and flaws, use photo editing software. It is important to have a flat, shadow-free background. The photo needs to retain its authenticity, so don’t go overboard with the editing. The editing should be kept to a minimum, with the sole purpose of addressing the official requirements. The photo has to show your actual look, so if you alter it too much or use too many filters, it might get rejected.
Cropping to Size
The dimensions of a passport photo must meet strict specifications. The specified dimensions in the United States are 2 by 2 inches. Make sure your head is in the middle of the frame and crop the image to the right size using an online tool or photo editing software. The ideal height for a human head is 1 1/8 inches, measured from the nape of the neck to the crown of the skull. Accurate cropping guarantees that the photo fits the specified dimensions while accurately portraying all important facial characteristics.
Printing the Photo
If you have a color printer, print your photo on premium photo paper. The printout must be legible and the colors must be true to life. A professional printing service is an option to consider in the absence of a photo printer. Poor print quality, such as low resolution or inaccurate color reproduction, might lead to rejection, so good print quality is essential. Check the printed images for any imperfections, such as lines or smudges, that may have occurred during printing.
Common Mistakes to Avoid
Improper Lighting
Steer clear of shadows and irregular lighting. Make sure there are no shadows on the background and that your face is brightly lit. Your features may be lost in a poorly lit photo, leading to its rejection. Take test shots to observe how the lighting impacts the photo and always double-check the lighting setup. Make any required adjustments to obtain a balanced and well-lit shot.
Incorrect Background
A simple, light-colored background is required. Stay away from any background objects, patterns, or textures. The photo might be rejected if the background isn’t plain. Get rid of any distractions and make sure the background is consistent. To get the right amount of contrast without making your features look too small, go with a white or light grey background.
Inappropriate Clothing
Dress in a simple manner. If you want people to notice your face, you should not wear a uniform, bright colors, or patterns. You want to make sure that your clothes stand out and don’t detract from the scene. Neutral or solid-colored clothing is ideal. Stay away from turtlenecks and high collars, as they might accentuate your neckline and draw attention away from your face.
Facial Expressions

Keep your face expressionless and your eyes wide open. Pay no attention to expressions like smiling or frowning. It is important that the passport photo captures your relaxed, natural expression. Smiling with visible teeth is not acceptable in a neutral expression. Keep both eyes wide open and face the camera the whole time. The photo may be rejected if it deviates from this.
Tips for Ensuring Your Passport Photo is Accepted
Check the Requirements
Make sure you research your country’s exact photo requirements for passports. Size, backdrop color, facial expression, and other variables are all within this category. Before you take your photo, make sure you know the specific regulations of each country. The most current and accurate information can be found on the official website of the issuing authority.
Review the Photo Carefully
Be sure to examine the image thoroughly before printing. Check the photo for potential rejection reasons, such as poor lighting, an inappropriate backdrop, or an awkward expression. Make sure the photo is perfect in every way and doesn’t have any obvious flaws that could cause it to be rejected. Checking your photo carefully before submitting it can save you the trouble of taking a new one and sending it in again for your passport.
Seek a Second Opinion
Get a second opinion by showing the photo to someone you trust. Their eyes might catch problems that you failed to notice. A new perspective can help you notice details that you were previously blind to. The opinion of an impartial third party regarding whether or not the photo satisfies all criteria is valuable.
Video Tutorial

Frequently Asked Questions
What are the dimensions for a U.S. passport photo?
The required dimensions for a U.S. passport photo are 2 x 2 inches. Ensure your head size is between 1 inch and 1 3/8 inches from the bottom of your chin to the top of your head.
Can I wear glasses in my passport photo?
As of November 1, 2016, glasses are not allowed in U.S. passport photos unless you have a medical condition that requires them. In such cases, you need a signed statement from your doctor. It’s important to note that the glasses should not obscure your eyes and the frames should not be overly thick.
What should I do if my photo is rejected?
If your photo is rejected, review the reasons given and retake the photo, ensuring it meets all the requirements. Pay particular attention to the specific issues mentioned and adjust your setup accordingly. Rejections are often due to common issues like improper lighting, incorrect background, or non-neutral expressions, so addressing these areas will help you produce an acceptable photo.
How can I ensure proper lighting for my passport photo?
Use natural light from a window or soft, diffused artificial lighting to avoid shadows and provide even illumination. Make sure the light is balanced on both sides of your face to avoid any shadows. Test different lighting setups until you achieve a clear, evenly lit photo that shows your features accurately.
Is it okay to smile in a passport photo?
No, you should maintain a neutral expression with both eyes open and mouth closed. Smiling, frowning, or any other expressions are not acceptable. A neutral expression ensures that your photo accurately represents your natural appearance, which is crucial for identification purposes.
Can I use a smartphone to take my passport photo?
Yes, most modern smartphones have cameras that are capable of taking high-quality passport photos. Ensure the resolution is high and the image is clear. Using a smartphone with good lighting and a stable setup can produce results comparable to those from a digital camera.
Conclusion
If you are careful and follow the instructions to the letter, taking passport photos at home can be a breeze. A high-quality passport photo that satisfies all requirements can be easily achieved with the correct equipment, an appropriate setup, and meticulous editing. You have more say over the end product and spend less time and money using this method. Avoid the trouble of retakes and rejections by following this guide to make sure your passport photo is accepted on the first submission.


